
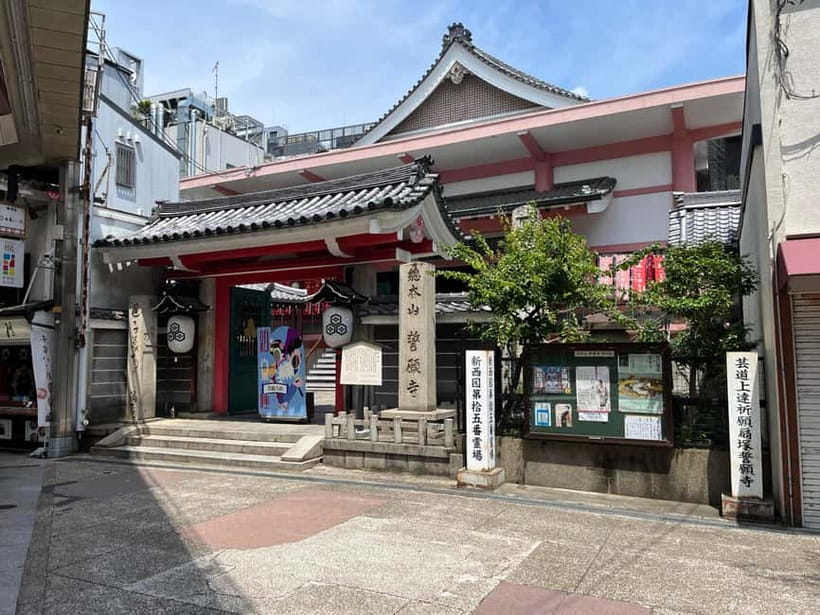
Reviewed · KYOTO CALLIGRAPHY CLASSES
Kyoto: Calligraphy class at Buddhist temple in city center
Kyoto’s city center gets noisy and crowded, but inside Seigan-ji Temple, you sit on tatami and work slowly with ink, brush, and paper. I like the small groups of up to six and the way the lesson builds from simple lines to a finished kanji on a special shikishi board. I also like that your souvenir is something you make, not something pulled from a shop shelf.
The main thing to consider is the seating. Most people sit on the floor on a zabuton, and desks are limited. Calligraphy also looks easier than it is, so do not expect a perfect first attempt. The patient teacher and translator help, but your final piece will still show the human hand.
Key Points Before You Book
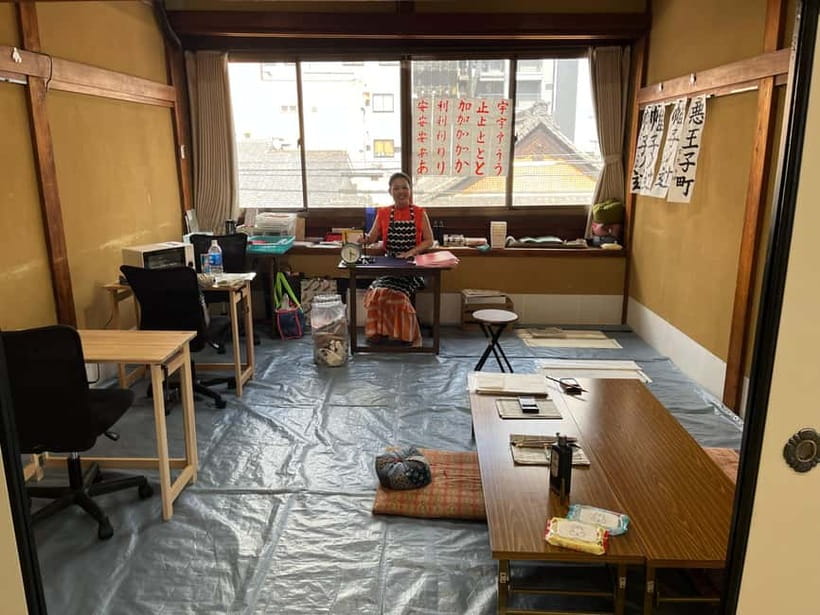
- A real temple setting: The class takes place in a Japanese-style room inside Seigan-ji Temple, near Kyoto’s central shopping streets.
- A 70-minute hands-on lesson: You learn tool use, basic strokes, and the structure of your chosen word or kanji before making a final piece.
- A personal souvenir: Your finished work goes home with you, along with a key chain made by the teacher using your selected character.
- Small-group instruction: With no more than six participants, the teacher and translator can offer individual tips.
- Choose your character early: Bring a few ideas for a word or kanji, though examples are available at the class.
- Floor seating matters: The experience is wheelchair accessible, but most seating is on tatami flooring and may strain your legs.
Why This Calligraphy Class Feels Different From a Quick Demonstration
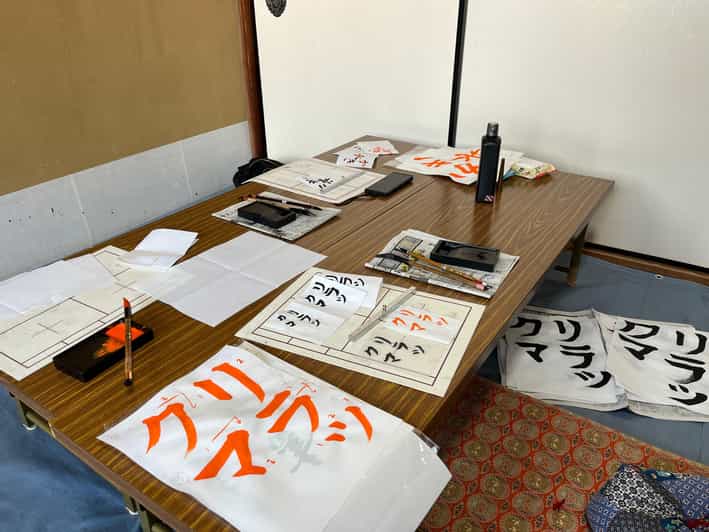
Many cultural activities let you watch an expert perform. This one asks you to pick up the brush and make the marks yourself. That changes the mood. You are not simply taking photographs of Japanese tradition. You are learning how much control, pressure, and patience go into a single character.
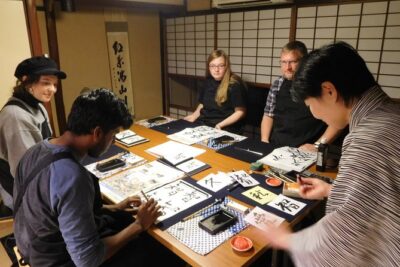
The setting helps. Seigan-ji Temple sits in the Shinkyogoku shopping street, right in central Kyoto, but the class takes place in a washitsu, a traditional Japanese room with tatami flooring. The contrast is useful: step off a busy shopping street, remove your shoes if instructed, and settle into a quieter space where everyone concentrates on the paper in front of them.
This is not a silent meditation class. You will hear explanations, questions, encouragement, and the occasional happy mistake. Still, the room tends to become calm because everyone is trying to place each brushstroke carefully.
The teacher has more than a decade of calligraphy experience, and some sessions have been led by Imai Sensei. The instruction is delivered in Japanese with help from a translator. Jose and Saskia are among the guides who have assisted with translation and photographs, while language options include English, Spanish, Japanese, and Dutch. Your exact guide depends on the session you book.
More calligraphy classes in Kyoto:
- Kyoto: Japanese Calligraphy Class
★ 4.8 · 89 reviews - Kyoto: Japanese Calligraphy Workshop
★ 4.7 · 84 reviews - Kyoto: Local Home Visit and Japanese Calligraphy Class
★ 5.0 · 66 reviews
Finding Seigan-ji Temple in Shinkyogoku
The meeting point is easy to miss if you rush. Stand in front of Seigan-ji Temple in the covered Shinkyogoku shopping street and look for a person holding a red lantern on a stick under the roofed arcade.
This detail matters. Do not climb the temple stairs looking for the class, and do not interrupt the monks or other temple workers to ask if you are in the right place. Wait at the front for the person with the lantern. If you have trouble finding the meeting point, use the contact information on your booking details.
The central location makes this a practical addition to a day around Nishiki Market, Shinkyogoku, and Teramachi. You can pair the class with shopping and food nearby, but remember that no food or drinks are served during the activity. Vending machines outside the temple can supply a drink before or after class.
The First Ten Minutes: Tools, Teacher, and the Meaning of Kanji
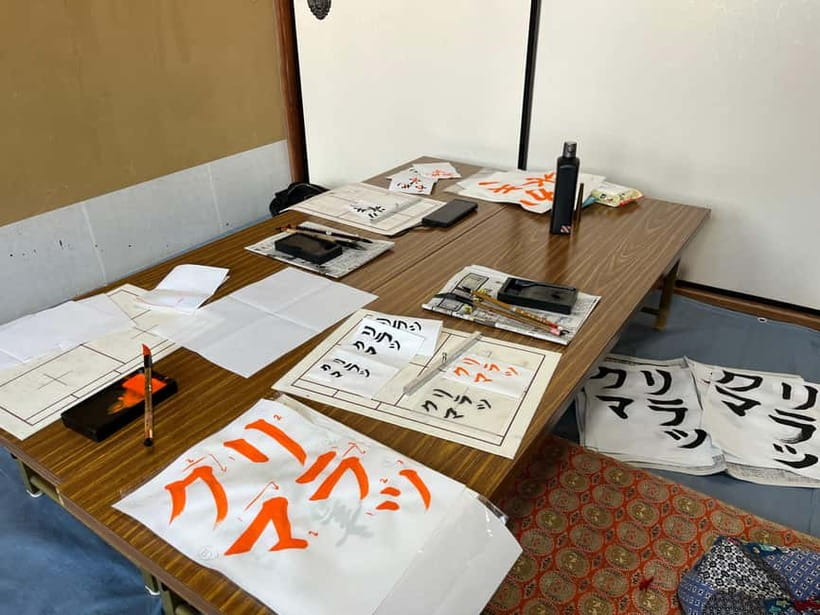
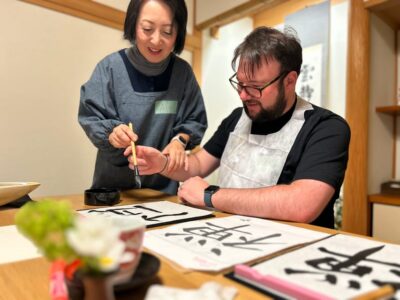
The session starts with introductions to the teacher and translator. You will also see the tools used in Japanese calligraphy, including washi paper, a brush, ink, a bunchi, and shitakami.
The names may be new to you, but the basic idea is simple. You work with a brush, ink, and paper while following the order and direction of each stroke. The teacher explains how to hold and use the tools, then demonstrates the movements slowly.
Calligraphy is taught in Japanese schools, not treated only as an unusual hobby. Part of its value is that it links the written character with its shape, origin, and structure. Even if you cannot read Japanese, you can see how a character is built rather than treating it as a decorative symbol.
You then select the word or kanji you want to write. Examples are available, but I strongly suggest arriving with several ideas. A single English word may have several possible Japanese translations, and the teacher can help you choose an appropriate character. Some people use a name, a value, or a word with personal meaning. Others choose a character simply because they like its form.
Do not wait until the final minute to think about this. The choice is one of the most enjoyable parts of the class, and a little preparation lets you spend more time learning the brushwork.
Practice Lines Before Your Chosen Character
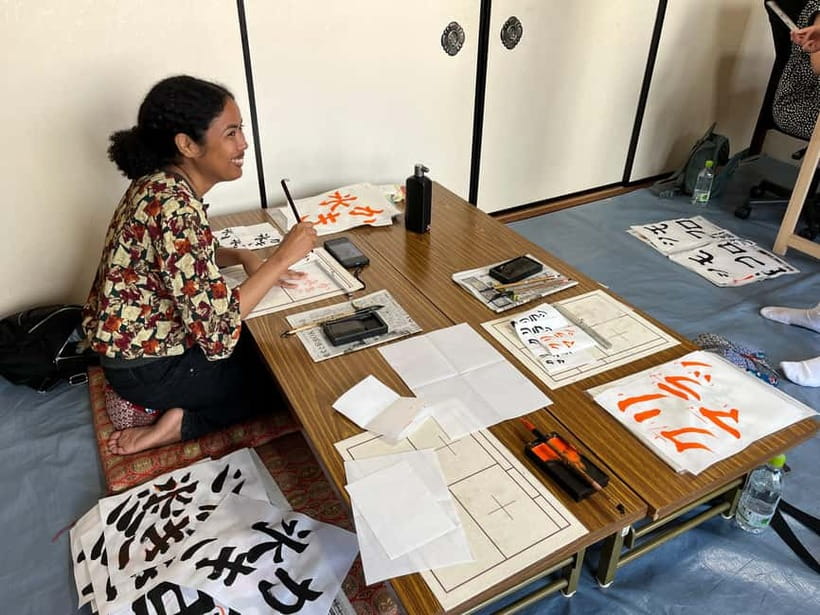
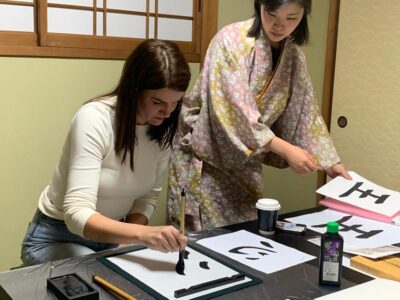
The teacher does not send you straight to the finished board. You begin with basic lines and simple movements. This is where you learn that the brush is not a marker.
Pressure changes the width of the line. Speed affects the look of the ink. The direction of your movement matters, too. The teacher demonstrates each point, and the translator explains what to watch for. You then practice under guidance.
This gradual structure suits beginners. You do not need previous art experience or Japanese language skills. The instruction is broken into small steps, and the teacher can correct your technique as you work.
Left-handed participants may find the class more demanding. Traditional brush technique is often easier for right-handed writers, though one left-handed participant found it helpful to try both hands. If you are left-handed, tell the teacher or translator early so they can offer practical advice.
The class also gives you a useful warning: practice is necessary, but too much practice can tire your arm. Once your hand is tired, the final character may look less controlled. I would follow the teacher’s advice and stop practicing while your arm still feels fresh.
More temples worth an hour in Kyoto:
- Kyoto: Tea Ceremony Ju-An at Jotokuji Temple
★ 4.9 · 3,207 reviews - Arashiyama Bamboo, Temple, Monkeys, or Secret Sake Brewery
★ 4.8 · 886 reviews - Kyoto: Arashiyama Bamboo Forest, Monkeys, Matcha & Temple Tour
★ 5.0 · 759 reviews - Kyoto Zen Meditation & Garden Tour at a Zen Temple with Lunch
★ 5.0 · 441 reviews
Creating the Shikishi Board
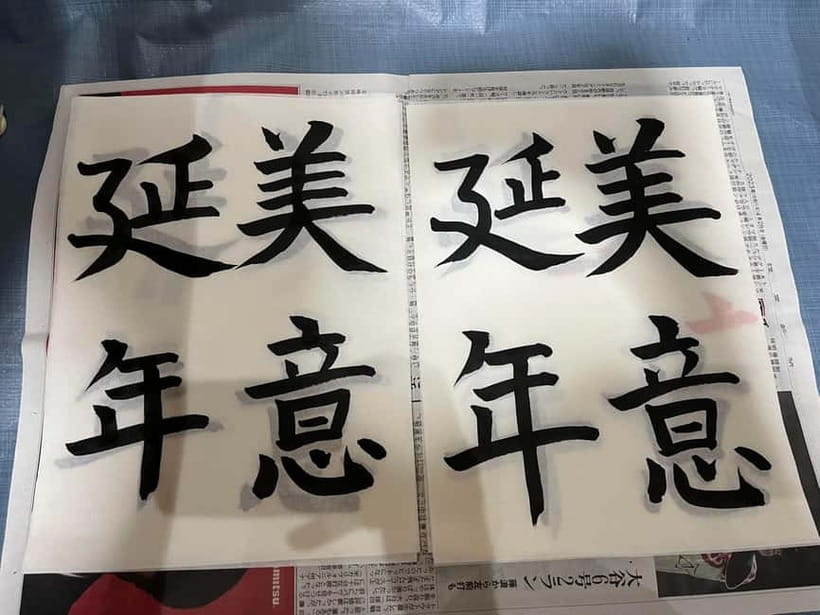
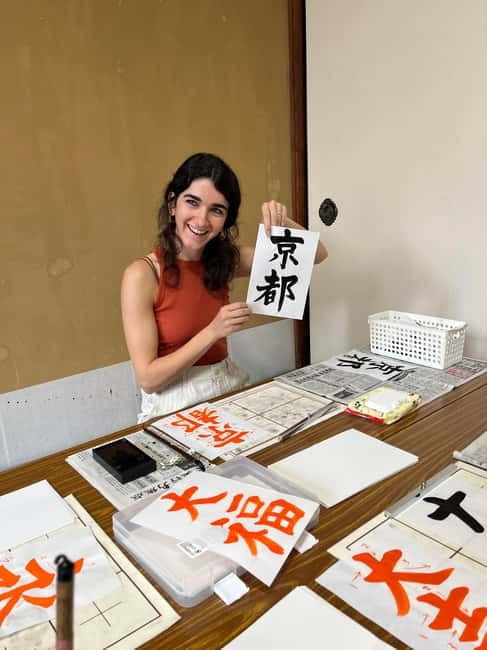
After you have practiced the strokes and your chosen character, you make the final version on a shikishi, a special square cardboard board used for display. This is the moment when the class shifts from exercise to keepsake.
You will not produce a professional calligrapher’s work in 70 minutes. That is not the point. The value is in understanding the process and leaving with a piece that carries your own uneven lines, decisions, and effort.
The teacher continues to guide you, and the small group allows room for individual suggestions. Translators can help explain corrections, while guides may take photographs during the practice and final work. The photographs are useful because your hands are busy, and it is difficult to document the class yourself.
The result can be displayed at home on a wall, shelf, mantel, or desk. It is light and easy to pack, although you should protect it from bending in your luggage.
The Personalized Key Chain and Other Small Touches
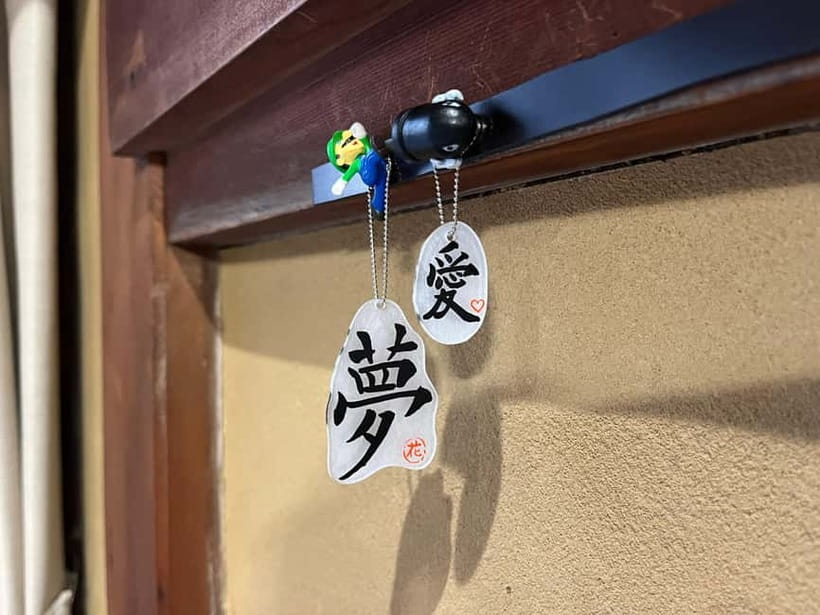
The finished shikishi is the main souvenir, but the teacher also makes a small key chain using your chosen character. This is a thoughtful extra because it connects the final artwork with something practical.
The class may also include photographs taken during the session. These small touches help the experience feel personal rather than like a fixed demonstration repeated without attention to the people in the room.
The strongest part of the activity is the human instruction. The Japanese teacher supplies the technical skill and demonstrations. The translator bridges the language gap, explains cultural points, and helps you understand corrections. Guides such as Jose have also taken an active role in encouraging participants and capturing photographs.
That partnership matters because the teacher may not speak English. The translator is not simply repeating words. The translator helps you understand why a stroke is made in a certain way and gives you a chance to ask questions.
The Temple Room and Tatami Seating
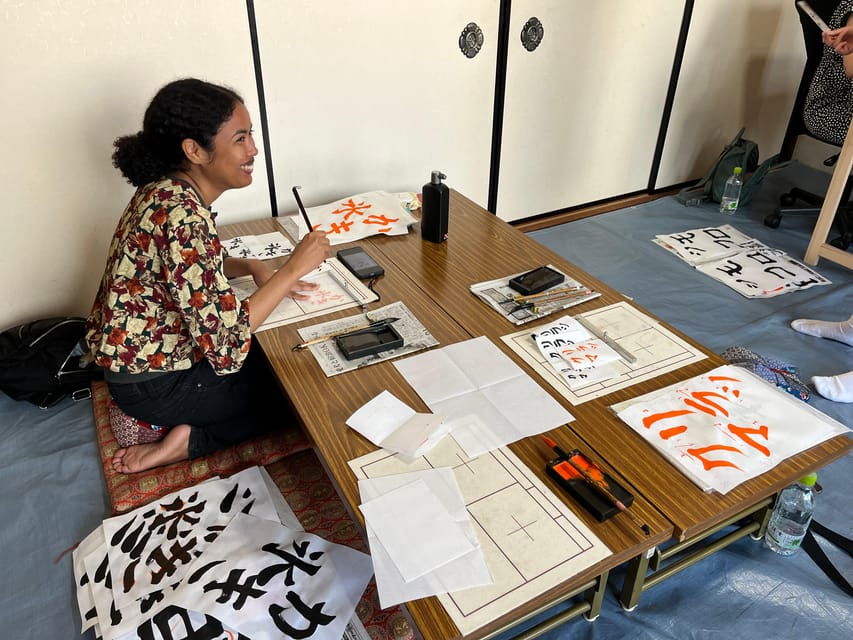
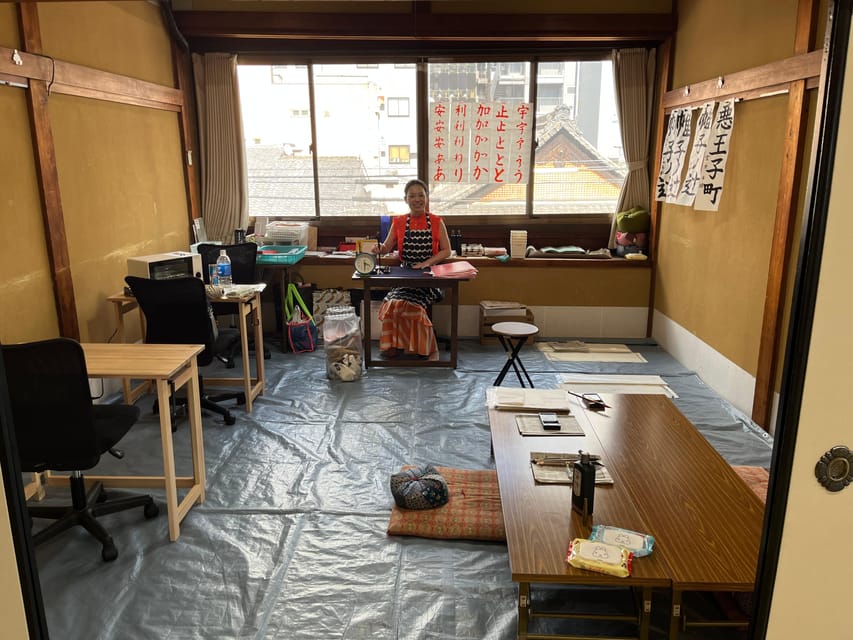
The washitsu setting is one of the reasons this class feels more substantial than a craft lesson in a hotel room. Tatami, sliding doors, and the temple surroundings give you a direct encounter with Japanese interior design and daily customs.
Most people sit on the floor using a zabuton. Some desks are available, but they are limited. If you have knee, hip, back, or leg problems, think carefully before booking. A wheelchair-accessible venue does not necessarily mean that floor seating will be comfortable or practical for every person.
Bare feet are not allowed, and smoking, vaping, alcohol, and drugs are prohibited. Bring or wear suitable socks and clothing that lets you sit comfortably. The room is quiet, but not completely silent, so this suits you if you want a calm cultural activity rather than strict silence.
The temple is an active religious place, not a stage set built for a class. Follow the meeting instructions, wait at the front, and treat the building and its workers with respect.
Is $55 a Fair Price for 70 Minutes?
At $55 per person, this is not the cheapest souvenir activity in Kyoto. You are paying more than the cost of buying a brush or printed kanji in a shop.
The value comes from the setting, the instruction, the materials, the translation, and the finished piece. You receive the use of washi, brush, ink, bunchi, and shitakami, plus practice time, examples, your shikishi artwork, and the personalized key chain. You also get access to a teacher with years of calligraphy experience rather than a simple drop-in craft table.
The small group improves the value. With a maximum of six people, the teacher can watch your strokes and offer direct advice. A larger class might cost less, but you would likely receive less personal help, especially when working with a character that feels unfamiliar.
I would consider the price reasonable if you want an activity with a meaningful object to take home. It is less compelling if you only want a quick photo or a polished souvenir made by someone else.
The reserve-now, pay-later option can help if your Kyoto schedule is still moving, and cancellation is free up to 24 hours before the activity for a full refund. Check the exact terms and starting time on your booking details.
Who Will Enjoy This Most?
I would recommend this class to couples, solo visitors, families with older children, and anyone who wants a slower hour between temple visits and shopping.
It works especially well for:
- People trying a Japanese cultural activity for the first time
- Visitors who want a handmade souvenir
- Beginners who like patient, step-by-step instruction
- Families with children old enough to sit quietly and handle ink
- Anyone interested in Japanese writing, design, or traditional tools
- Visitors who want a central Kyoto activity without a long trip across the city
It is not suitable for children under five according to the age restrictions provided. It is also not suitable for visually impaired participants. The activity is wheelchair accessible, but the floor-based seating remains an important practical concern.
If your main goal is sightseeing, this class will not show you a large temple complex or famous garden. Its appeal is narrower and more personal. You spend most of the hour focused on a brush and a square of paper.
Practical Advice for a Better Finished Piece
Think about your word before you arrive. Bring two or three ideas, and be ready to accept the teacher’s advice about the best kanji.
Wear comfortable clothing and socks. You may sit on the floor for most of the 70 minutes, so tight or restrictive clothing can make the class harder than it needs to be.
Do not judge your progress by the teacher’s demonstration. A trained calligrapher can make a difficult character look effortless. Your job is to learn the basic movements and produce something personal.
Use the practice sheets wisely. Make enough attempts to understand the strokes, but do not exhaust your arm before the final work. The final board is more likely to look balanced if your hand is still relaxed.
Keep your expectations realistic. Your character may be uneven, and that is part of the charm. The class gives you a first look at the discipline behind Japanese calligraphy, not instant mastery.
Should You Book the Seigan-ji Calligraphy Class?
I would book it if you want a hands-on cultural experience in central Kyoto and like the idea of bringing home something you made yourself. The combination of a temple room, a skilled Japanese teacher, translator support, small-group attention, and a personal key chain gives the 70 minutes real substance.
I would hesitate only if floor seating is uncomfortable, you want a completely silent activity, or you prefer professionally made souvenirs. For everyone else, especially first-time visitors who want to do more than look at temples, this is a thoughtful choice. Bring a few kanji ideas, arrive at the red lantern, and let the imperfect brushstrokes become part of the memory.
FAQ
How long does the Kyoto calligraphy class last?
The experience lasts about 70 minutes, including introductions, tool instruction, practice, and creation of your final artwork.
Where does the class meet?
Meet in front of Seigan-ji Temple in the covered Shinkyogoku shopping street. Look for the person holding a red lantern on a stick under the roof.
Should I enter the temple to find the class?
No. Do not go up the stairs or ask the monks and other temple workers for the workshop. Wait at the front of the temple for the person with the red lantern.
Which languages are available?
The experience is offered in English, Spanish, Japanese, and Dutch. A translator helps explain the Japanese teacher’s instruction.
What will I make during the class?
You will practice basic brush lines and your selected word or kanji, then create a final piece on a shikishi board. You take the artwork home.
Do I receive any other souvenir?
Yes. You also receive a key chain made by the teacher using your chosen character.
Are food and drinks included?
No. Food and drinks are not served. Vending machines are available outside the temple.
Is the class suitable for wheelchair users?
The activity is listed as wheelchair accessible. However, most seating is on the tatami floor with a zabuton, and only a limited number of desks are available.
Can I cancel my booking?
You can cancel up to 24 hours in advance for a full refund. A reserve-now, pay-later option is also available.
Newest Kyoto experiences on the site
- Treasures of Kyoto: Gion & historical Walking Tour★ 5.0 · 6 reviews
- Whisk Your Own Matcha: A Zen Matcha Experience at Temple★ 3.6 · 7 reviews
- Kyoto tea town for matcha lovers★ 5.0 · 16 reviews
- Uji: Private immersion into Kyoto’s tea and reglious culture★ 5.0 · 17 reviews
- Kyoto Matcha Green Tea Tour★ 4.5 · 23 reviews
- Uji and Wazuka Matcha Farm Half Day Private Guided Tour★ 5.0 · 21 reviews
- Utilising upcycled Matcha! Creating matcha incense (Uji, Kyoto)★ 5.0 · 6 reviews
- Sacred Temple Yoga Experience in Japan★ 5.0 · 3 reviews
Kyoto Calligraphy Classes, compared.
Kyoto Ninenzaka : Japanese Calligraphy Class in Townhouse
Read our review →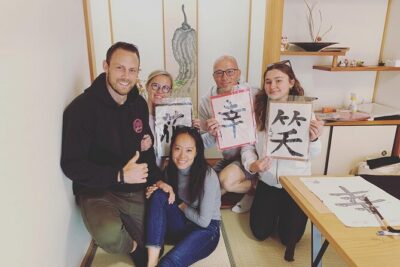
Private Japanese Calligraphy in Kyoto – Learn Shodō with a Master
Read our review →
Japanese Calligraphy – Shodo – Lesson (near Kyoto Station)
Read our review →
Browse the lists this tour appears in